Shape camera movements
Create Walk, Drone and Facade Slide shots. Adjust routes, timing and camera aim.
 sketchingo.
Walk through a space. Slide along an elevation. Fly around your design. Build the shots, choose the look and export your film inside SketchUp.
Windows · SketchUp 2024
6 months · 2 computers · No automatic charge
Plan the movement.
Watch the framing.
Refine the finish.
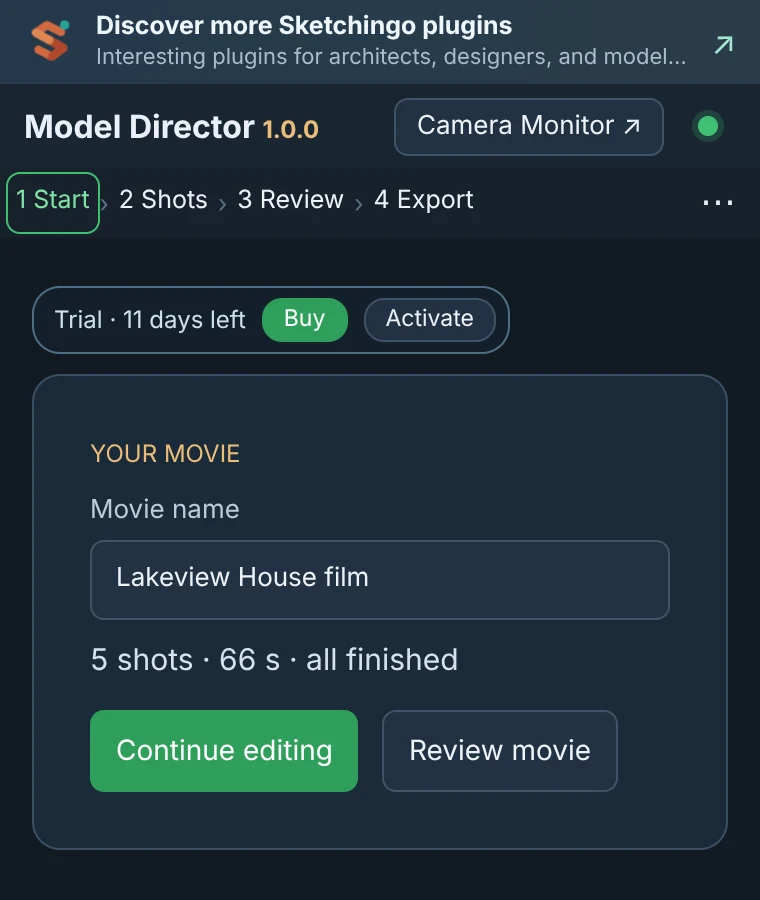
Actual interface captures from 1.0.0; some labels differ in 1.0.3.
Watch the full launch video and explore Model Director for SketchUp.
Real screenshots from Model Director in SketchUp. Open an image to see the controls at full size.
Choose a camera move, draw the route and frame the shot.
 View full-size screenshot ↗
Walk, Drone and Facade Slide are presented together, with a simple diagram for each movement.
 View full-size screenshot ↗
Choose the facade, draw in the model or on the drawing sheet, and set the path height or follow the ground.
 View full-size screenshot ↗
Adjust distance, camera height and field of view, then check positions along the route.
Keep your shots organised, review the sequence and choose the music.
 View full-size screenshot ↗
Return to an existing shot or add another movement to build your movie.
 View full-size screenshot ↗
Arrange shots, include the ones you want, choose transitions and add presentation slides.
 View full-size screenshot ↗
Choose an instrument, set its mood and adjust the music volume.
Set the visual style and prepare the export.
 View full-size screenshot ↗
Compare the available looks, from daylight and pastel to architectural model and ink.
 View full-size screenshot ↗
Choose what to render, the output quality, frame rate and final look.

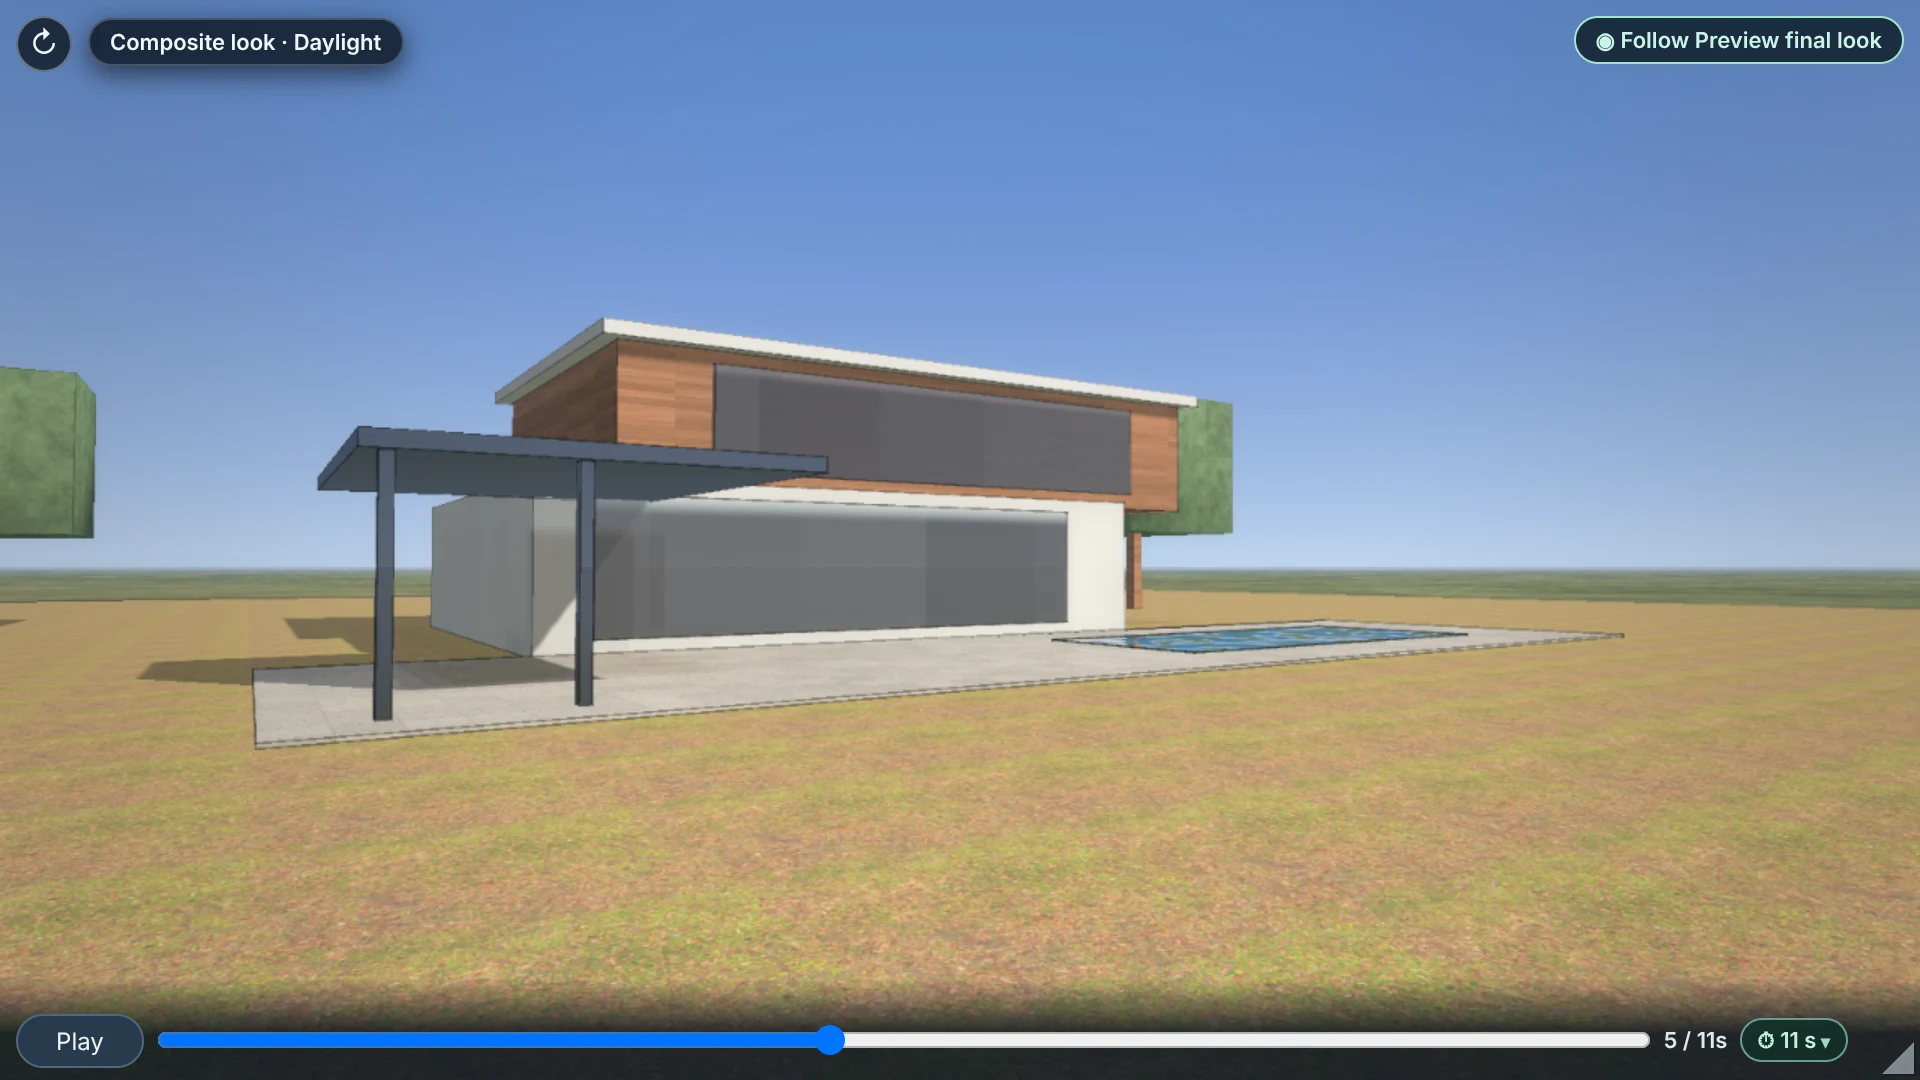
Preview the framing and the selected look alongside your model. Captured in SketchUp with Model Director 1.0.3.
Keep your movie setup, camera movements, sequence and output settings in one workflow. Expand the tutorials below for detailed panel references.
Create Walk, Drone and Facade Slide shots. Adjust routes, timing and camera aim.
Use Highlights to give entrances, elevations and design features their moment.
Arrange shots, preview the sequence and choose the visual finish for your export.
Add presentation slides, choose transitions and build a soundtrack with instrument and mood choices.
Preview a final-look still, compare styles and refine the appearance before exporting.
Export one shot, selected shots or the whole film, from a quick preview to 4K.
Imagine your next film
Guide a camera through the spaces you designed.
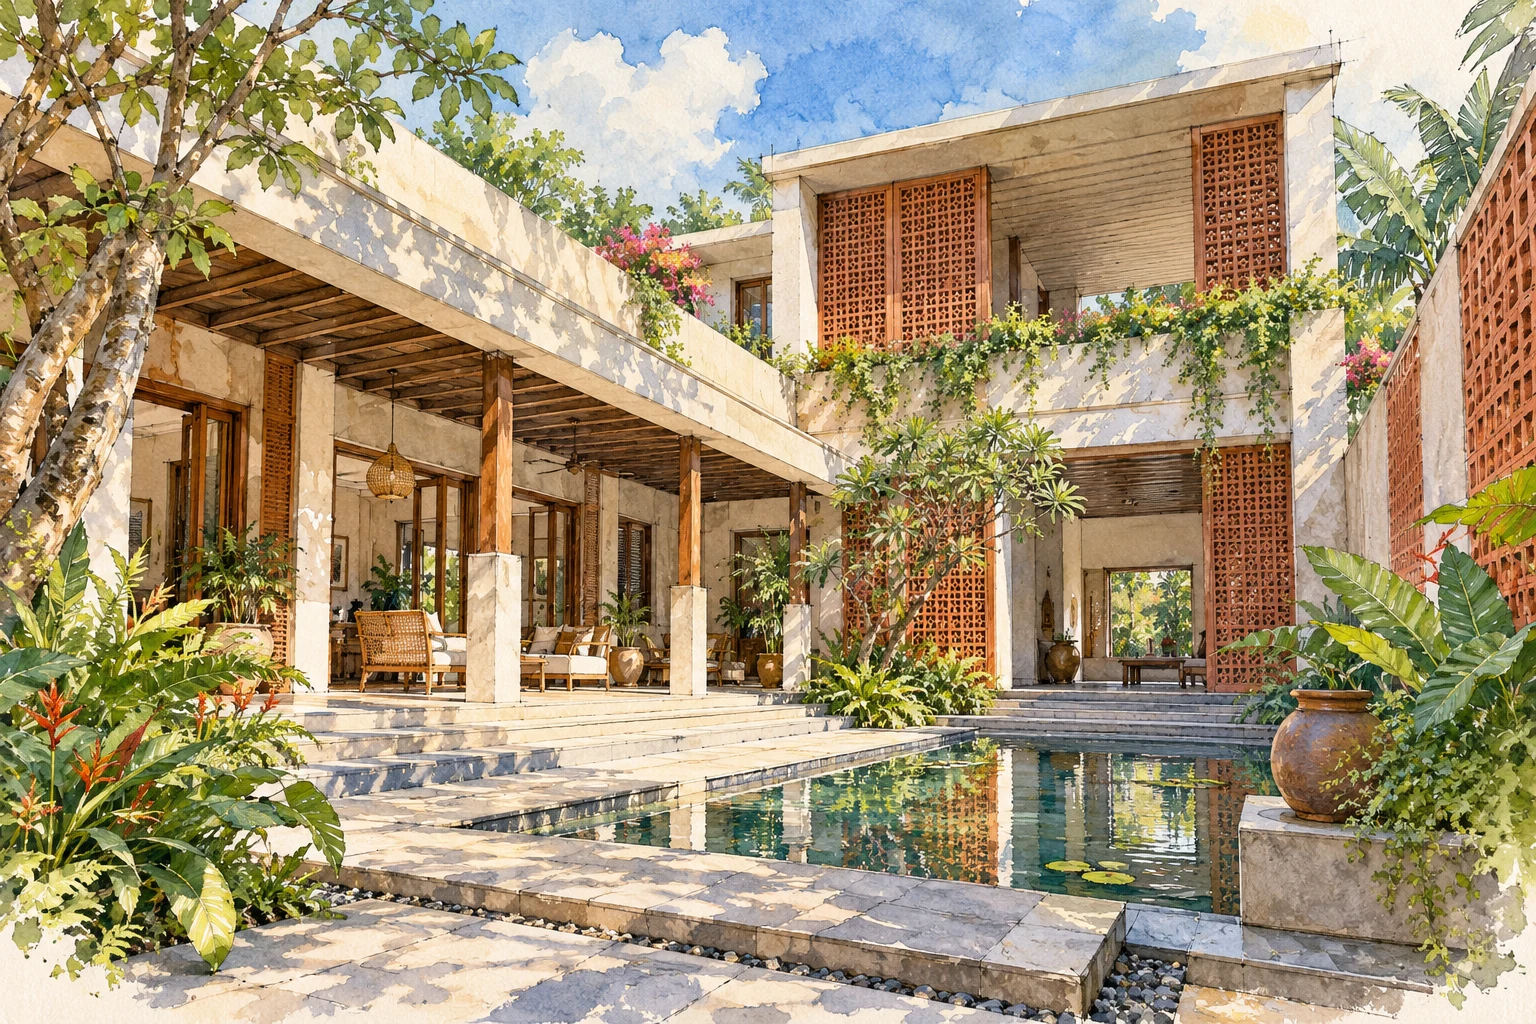
Illustrative concept · not a plugin renderSwitch between SketchUp, Enhanced and Composite looks, then refine the appearance for your project.
A familiar presentation of model colours, edges and sky.
Sky lighting, colour grading and edge choices while retaining your model colours.
Choose from realistic, artistic and playful treatments, then fine-tune the result.
These comparison images were rendered by Model Director 1.0.0 using the same model and camera. They show the twelve styles still available in 1.0.3.

Clear daylight and a clean architectural finish.

Painted washes, pencil-like lines and cool shadows.
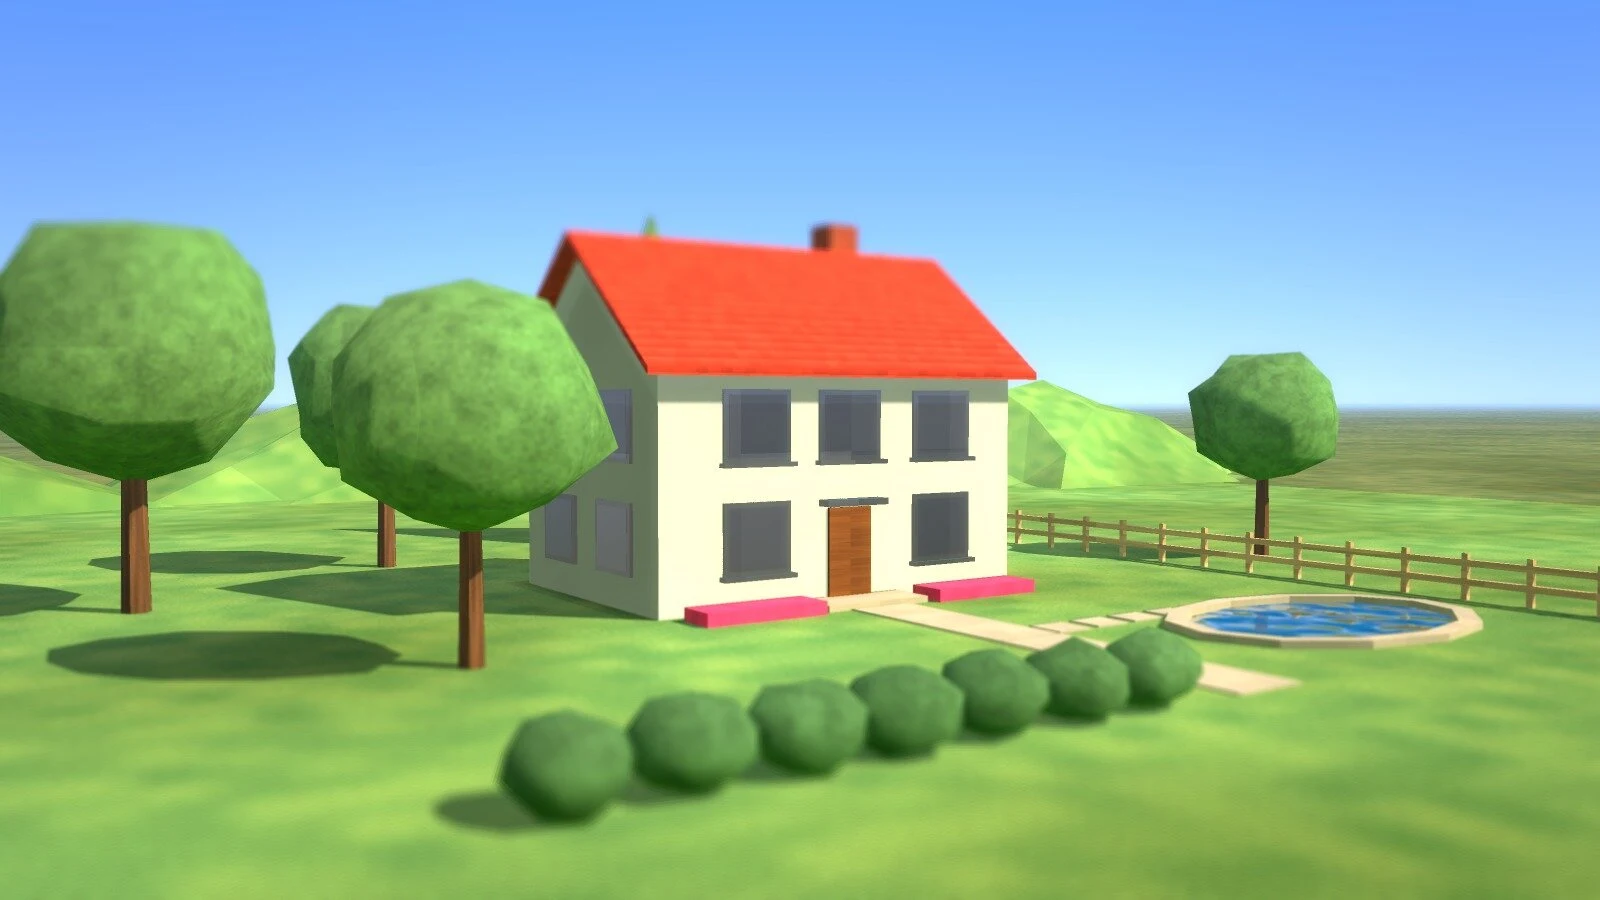
A toy-model feel with tilt-shift blur, especially suited to aerial views.

Warm low sun and a cinematic colour treatment.

Blue-hour atmosphere with warm window light.
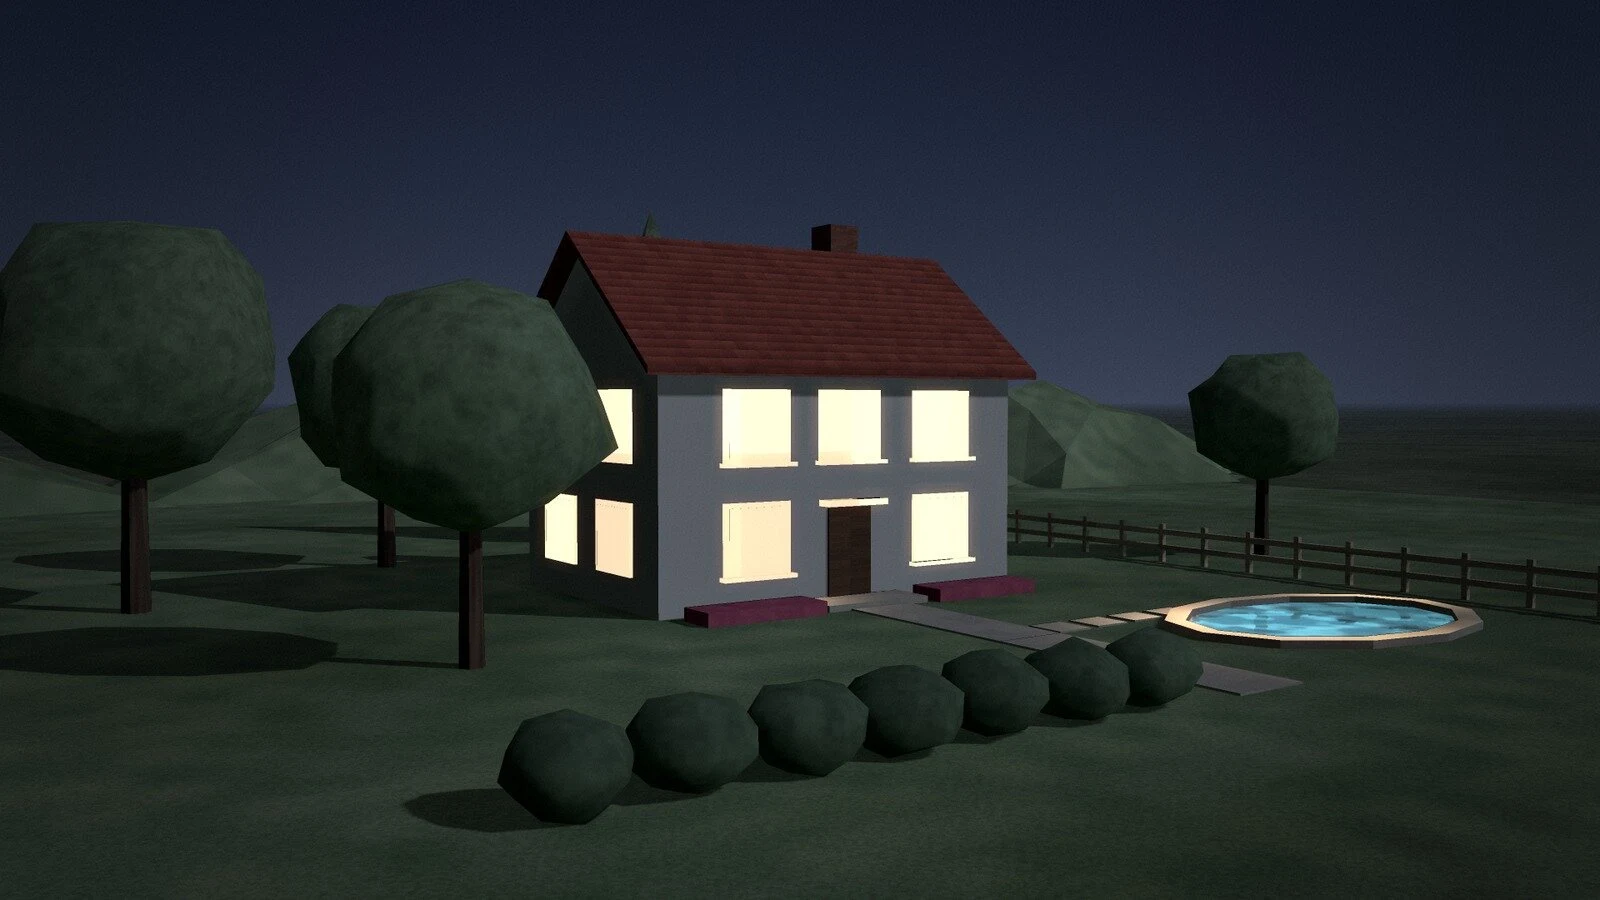
Cool night tones and warm lit windows.

A more atmospheric moonlit presentation.
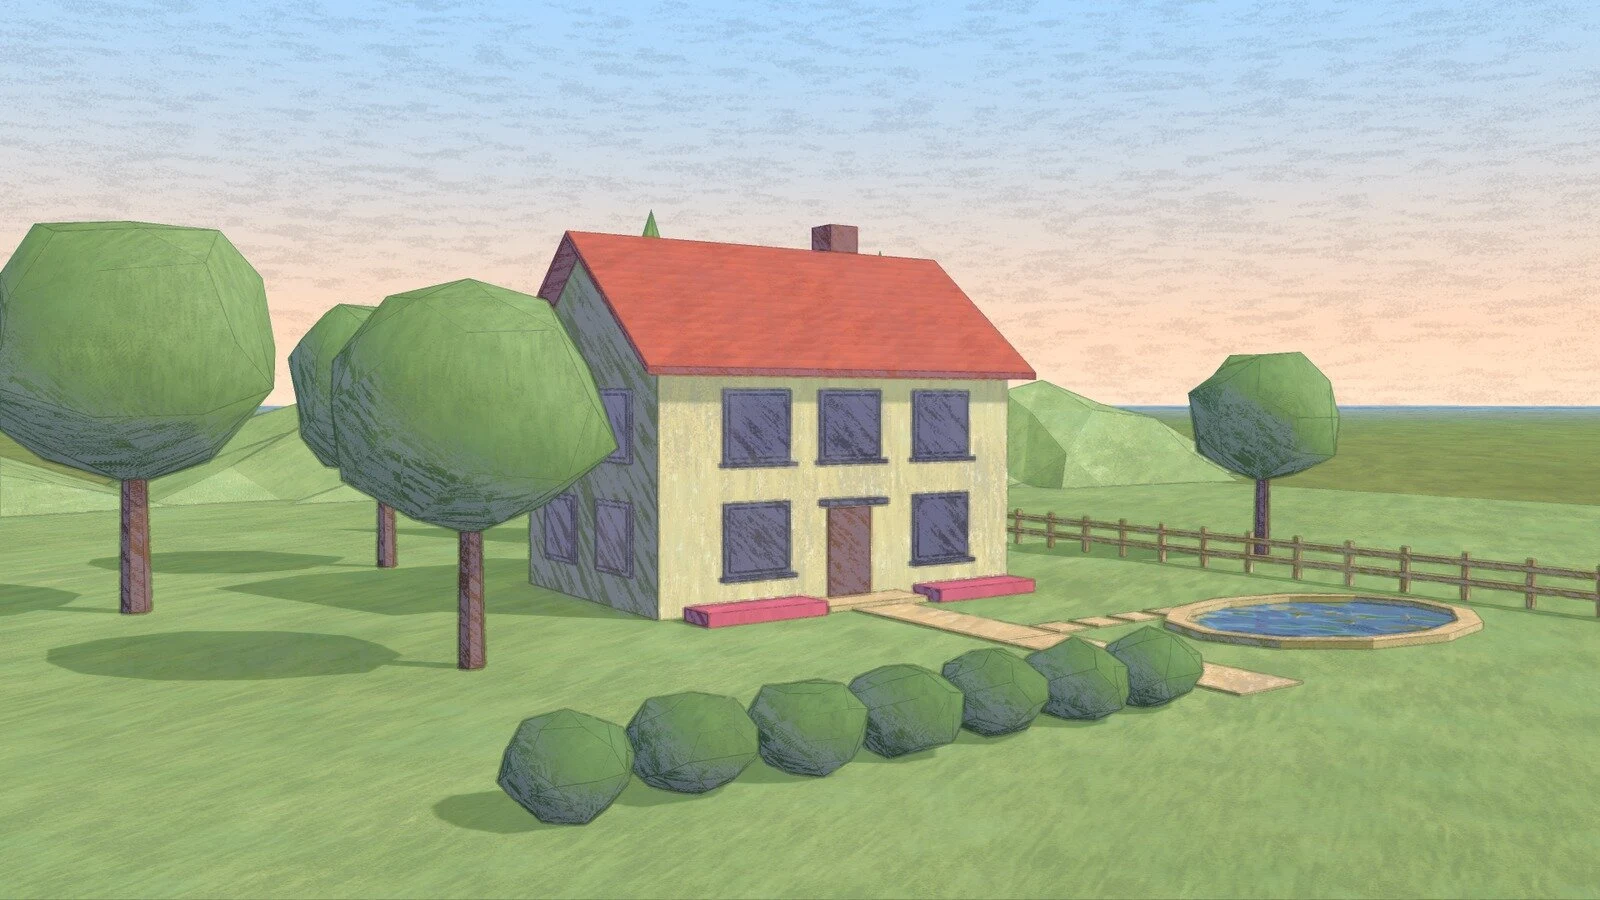
Chalk-like strokes, gentle colour and soft highlights.

A white study-model treatment with restrained colour accents.

Ink outlines and loose colour washes.
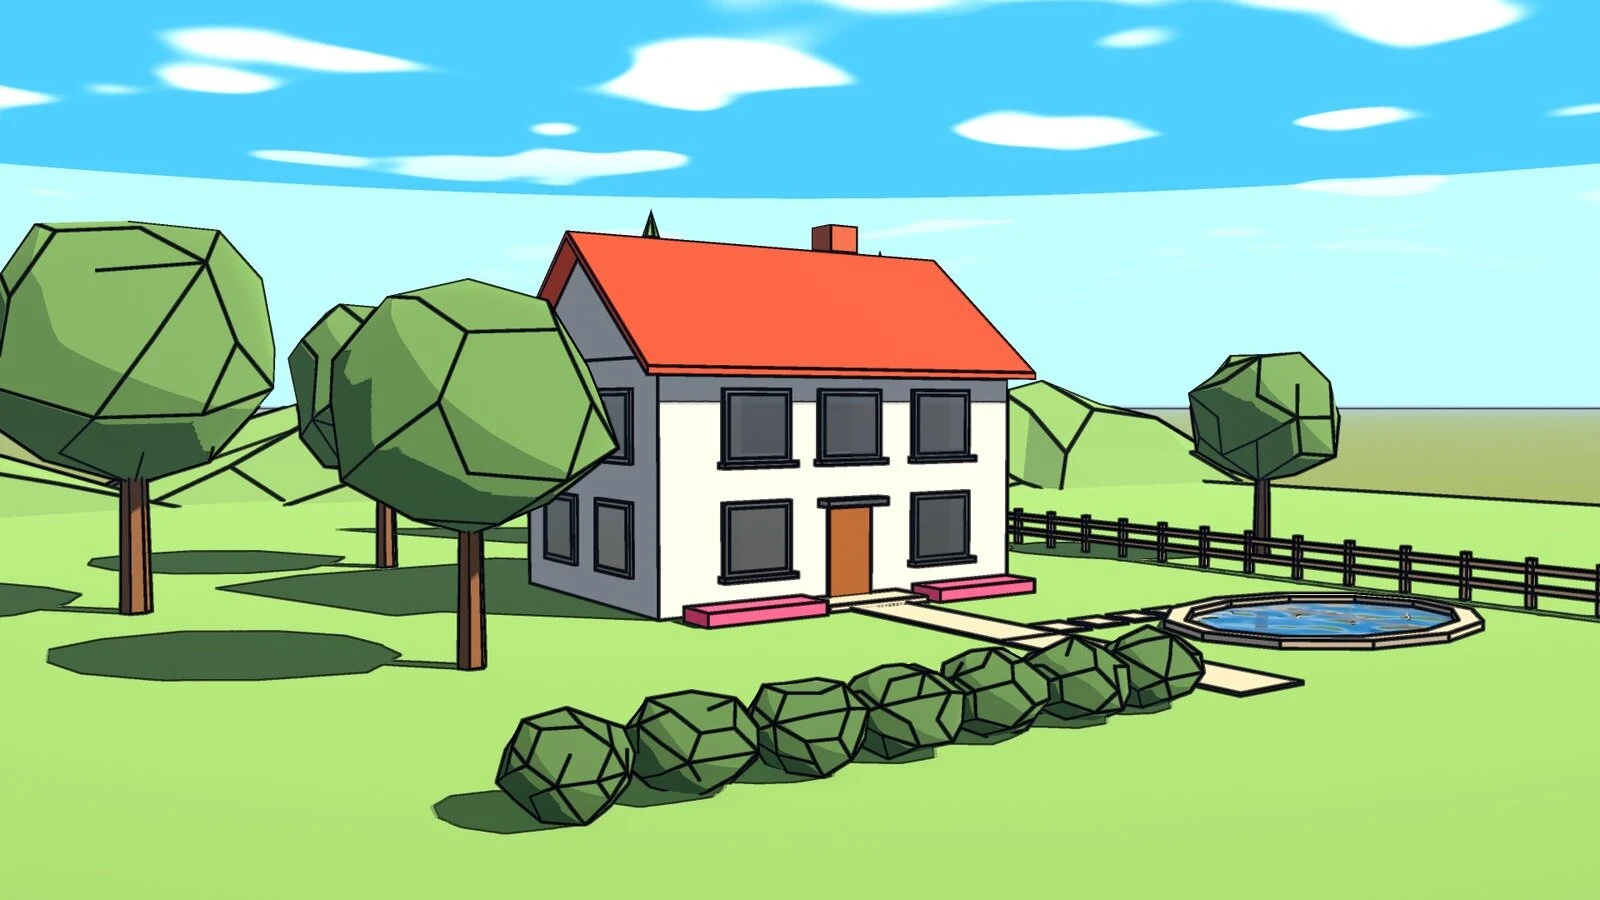
Bold outlines, banded light and bright colour.
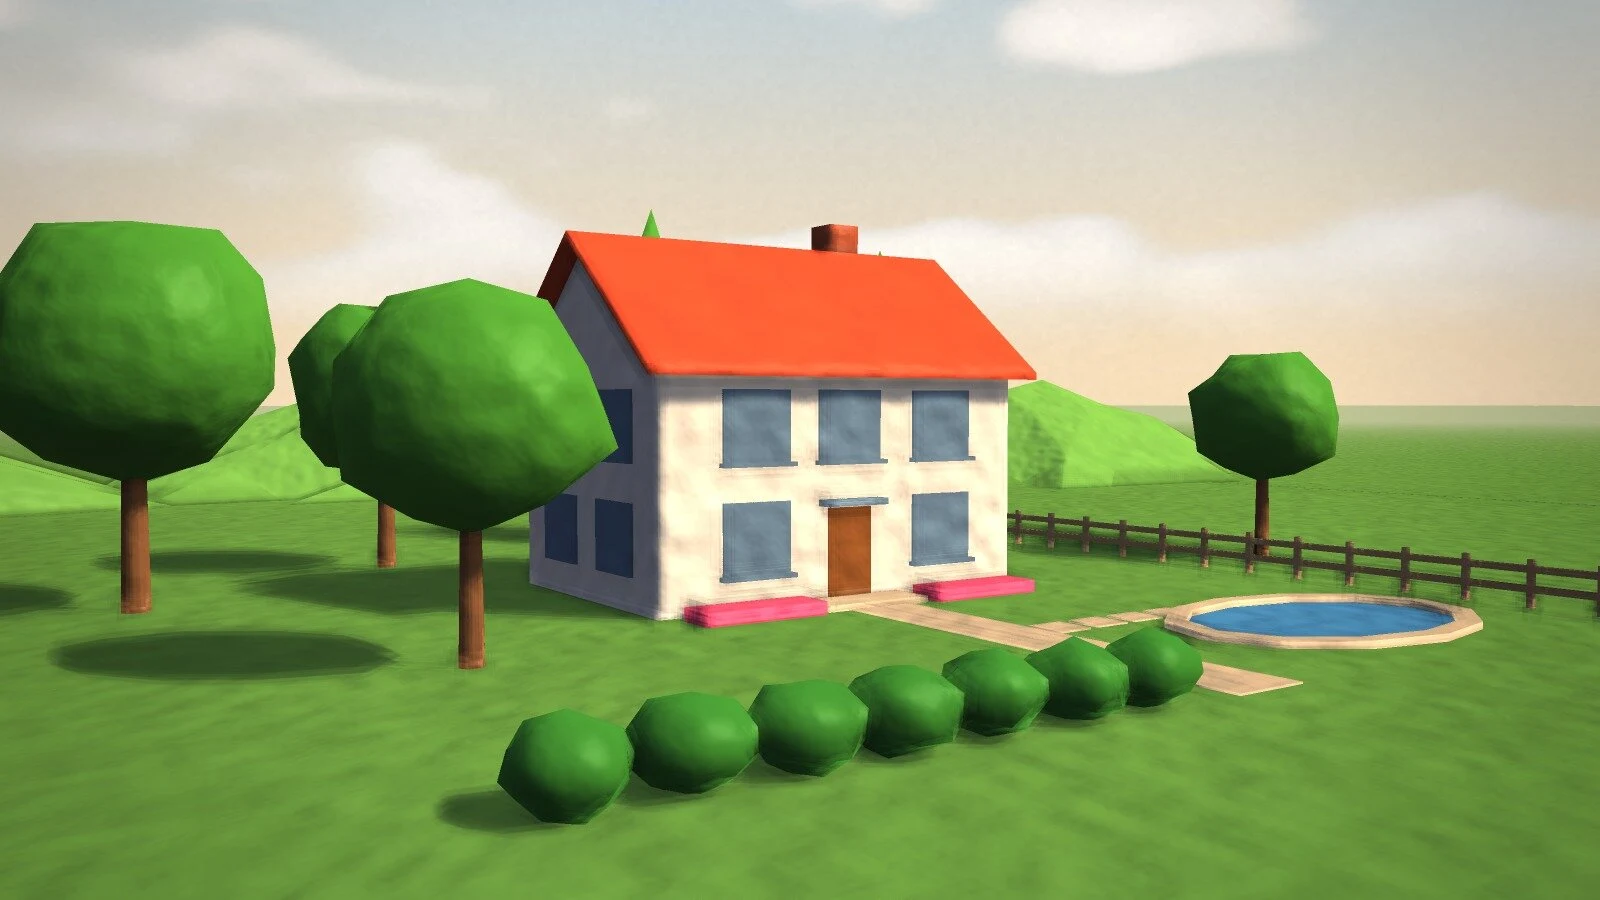
A sculpted clay appearance with soft light and playful colour.
Skies: Clear day, Golden hour, Soft dawn or Plain. Colour grades: Neutral, Warm or Cool. Edges: Soft outline, None or As in SketchUp.
Skies: Clear day, Golden hour, Overcast, Dusk or Night. Edges: Soft outline, Ink lines or None.
Adjust exposure, colour, warmth, contrast, shadows, glow, vignette, grain, texture strength, hand-painted wobble and effect. Use Preview final look to check changes, or Reset to preset to start again.
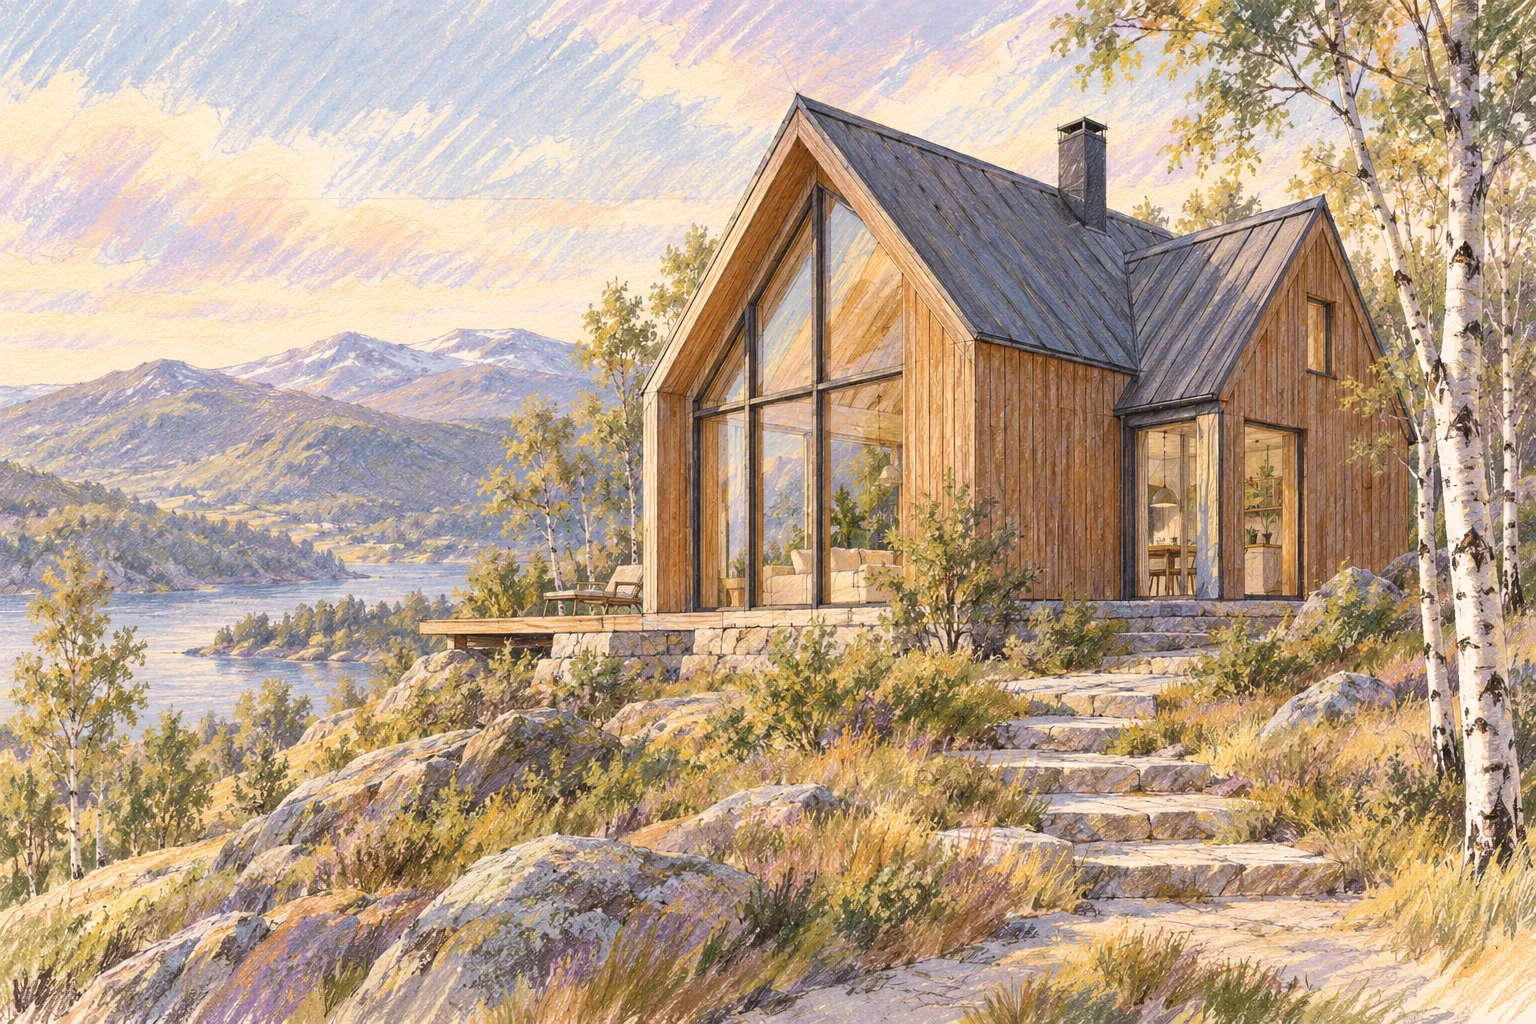
Imagine your next film
Explore colour, atmosphere and the finishing touches.
Illustrative concept · not a plugin renderBuild the shots, then shape how the film feels. In Review, Model Director lets you choose a musical character, set the mood, hear the result and create another variation—all inside the plugin.
Let Model Director choose the musical direction for your movie. Play it back and hear how it sits with your sequence.
Take the creative lead. Choose one of eight sound options and one of five moods, then create and preview your tune.
Prefer a silent presentation? Turn music off and keep the attention on the visuals.
These illustrations introduce the sound choices. Ambient and Orchestral represent a sound style or ensemble, rather than a single instrument.
Choose a mood, then click an instrument illustration. Each selection plays an 18-second sample created with Model Director 1.0.3. Changing the mood plays that instrument in the new mood.
Loading music controls…
Genuine plugin-created examples. Create new plays the next of three prepared tunes for your chosen instrument and mood, then cycles back. Create more variations inside Model Director. Only one sample plays at a time.
A soft starting point for an intimate walkthrough or a quiet residential film.
Give an architectural reveal a flowing, expressive accompaniment.
An electronic character for contemporary spaces and clean visual compositions.
A broader sound for sweeping views and a sense of occasion.
Let the space breathe with a restrained, atmospheric background.
A playful, percussive colour for light, welcoming presentations.
Keep a melody while adding a more rhythmic foundation.
Choose a drum-kit groove when you want percussion on its own.
Try the samples above, then create your own variations inside Model Director.

Ten short lessons, all in one place. Open a lesson for the quick steps. Tutorial videos are coming soon; the launch demonstration above is available now.
Install, try, activate
The written guide and panel references are ready below.
Download the RBZ from this page. In SketchUp 2024 on Windows, open Extensions → Extension Manager → Install Extension and select it. Restart SketchUp, then open Model Director from Extensions.
Try the available features for 14 days. Trial exports carry a watermark. Give your movie a name on the Start page and begin with one short shot.
Use More → Licence, or Activate in the trial notice, and enter the key from your purchase email. Updating or reinstalling does not extend the paid licence expiry.
Actual interface captures from version 1.0.0. Some labels and layout may differ in version 1.0.3. Select a panel to enlarge it.
Four tabs. One workflow.
The written guide and panel references are ready below.
Name your movie, return to an existing setup, or begin a new sequence.
Create and edit Walk, Facade Slide and Drone movements. Keep the Camera Monitor beside the workspace to check the framing.
Arrange shots, add presentation slides, choose transitions and music, and preview the movie.
Choose the look, output quality, frame rate and which shots to render. Preview a final-look still before the full export.
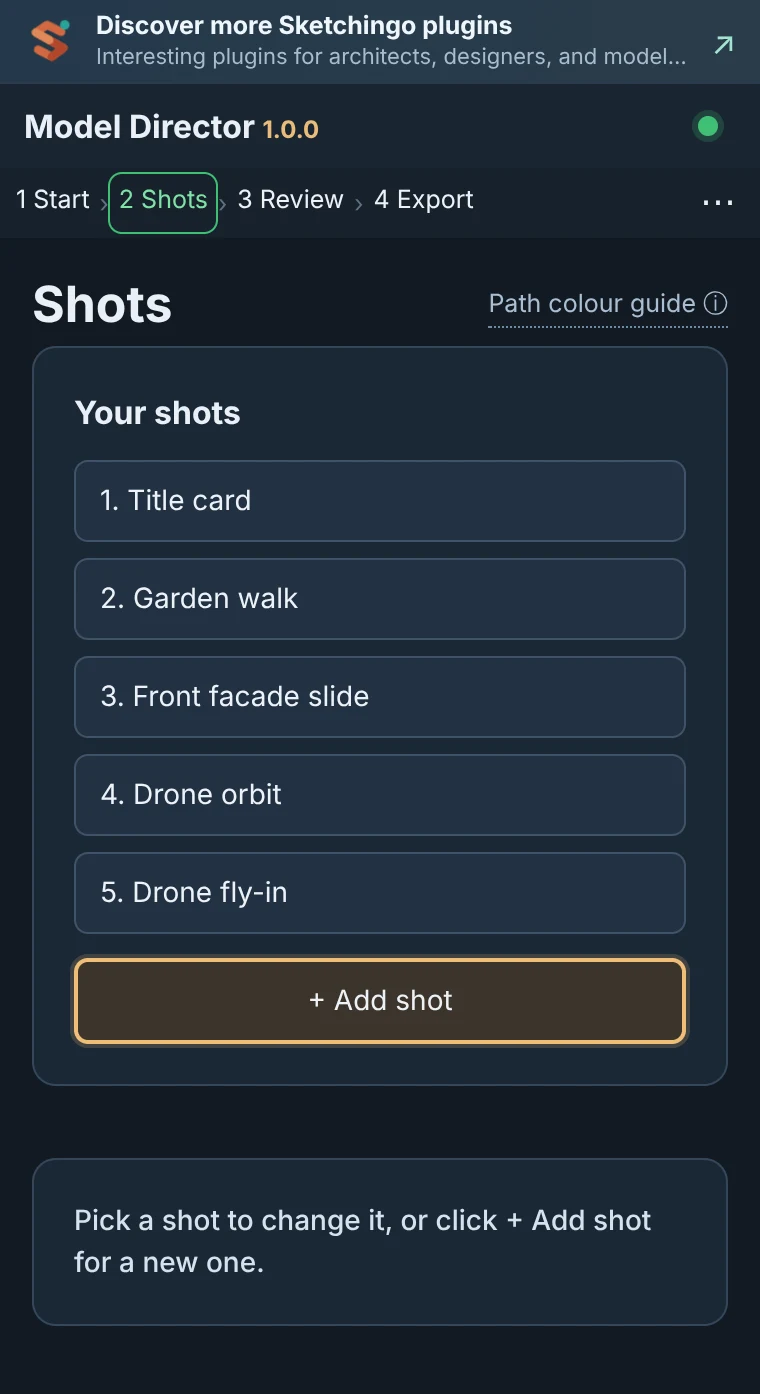

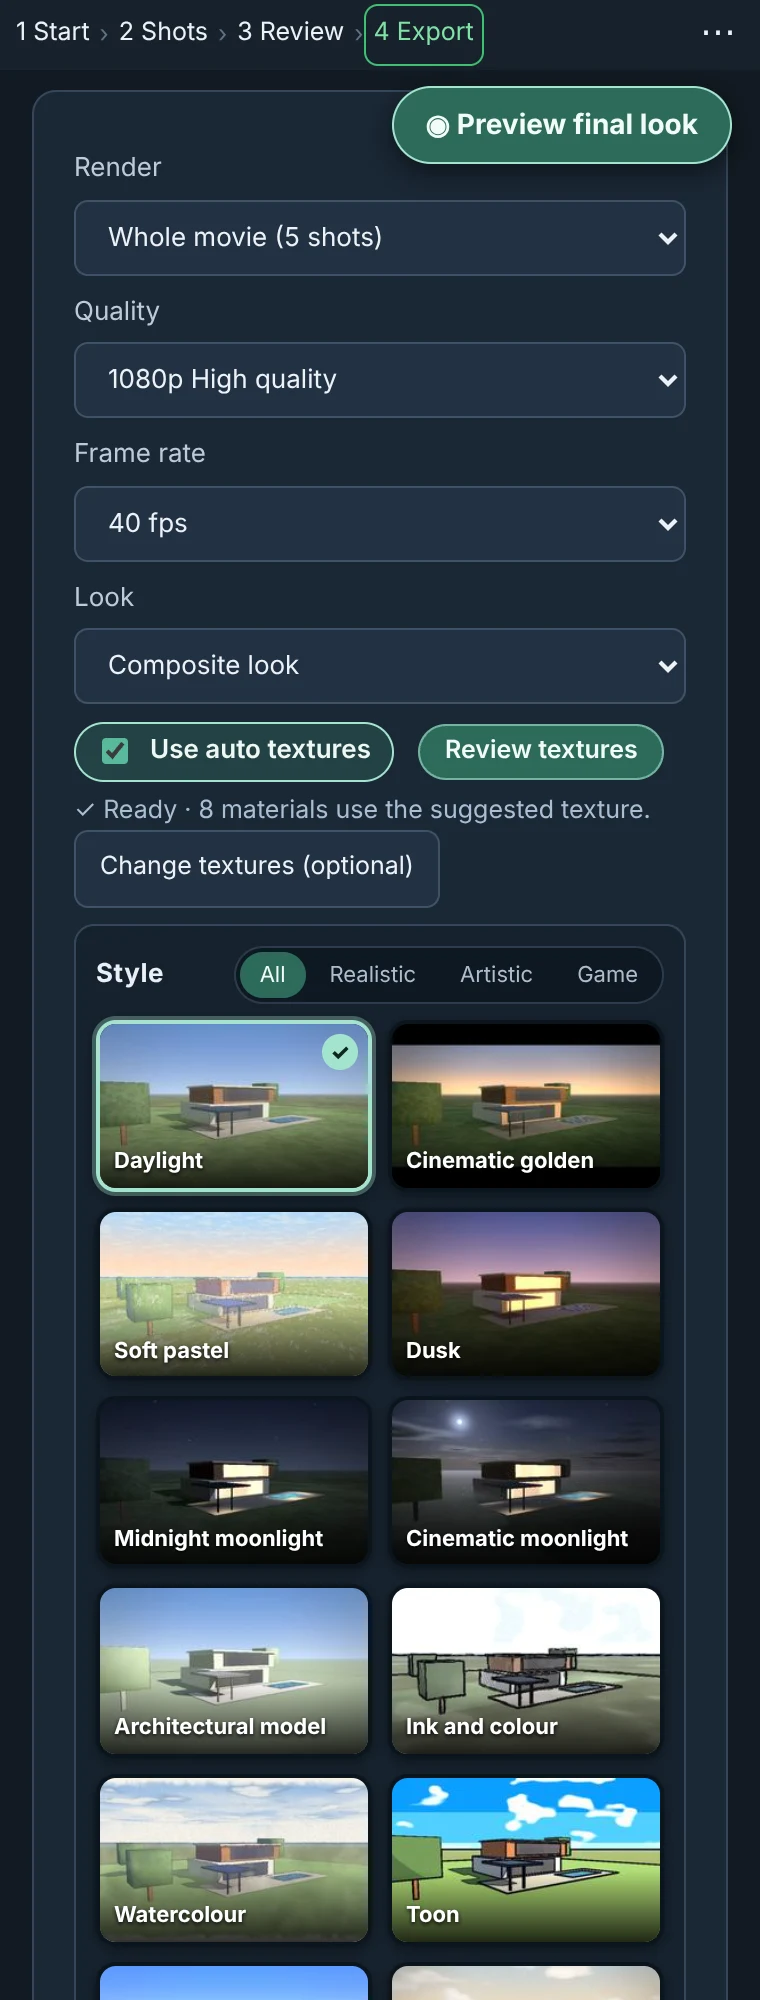
Actual interface captures from version 1.0.0. Some labels and layout may differ in version 1.0.3. Select a panel to enlarge it.
Draw, aim and frame
The written guide and panel references are ready below.
Start with a short Walk, Facade Slide or Drone shot. Give it a useful name so it is easy to find in Review.
Look along the path, use a fixed direction or set an aim point. Where available, select an object to aim at without changing the route.
Adjust camera height, offset and field of view. Use Wide, Normal or Close as a starting point, then fine-tune. Set travel time and any start or end pauses.
Play the shot in the Camera Monitor. Refine the view, then add the next movement.


Actual interface captures from version 1.0.0. Some labels and layout may differ in version 1.0.3. Select a panel to enlarge it.
A walk that fits your space
The written guide and panel references are ready below.
Use the Drawing sheet for a top-view route, or In the model to draw on floors and ground. Finish the path when the route is ready.
Move points, adjust heights, add or remove points and change Roundness. Reverse the travel direction when needed. Undo last point corrects the current drawing step.
Use Level for a fixed height or Above ground for a route with ground clearance. Check the resulting route in the Camera Monitor.
Steady glide creates smooth travel. Walking adds gentle footsteps; adjust Motion strength and walking speed to suit the scene.
Adjust field of view, eye height, travel time and pauses. Use Highlights when a feature deserves more attention.

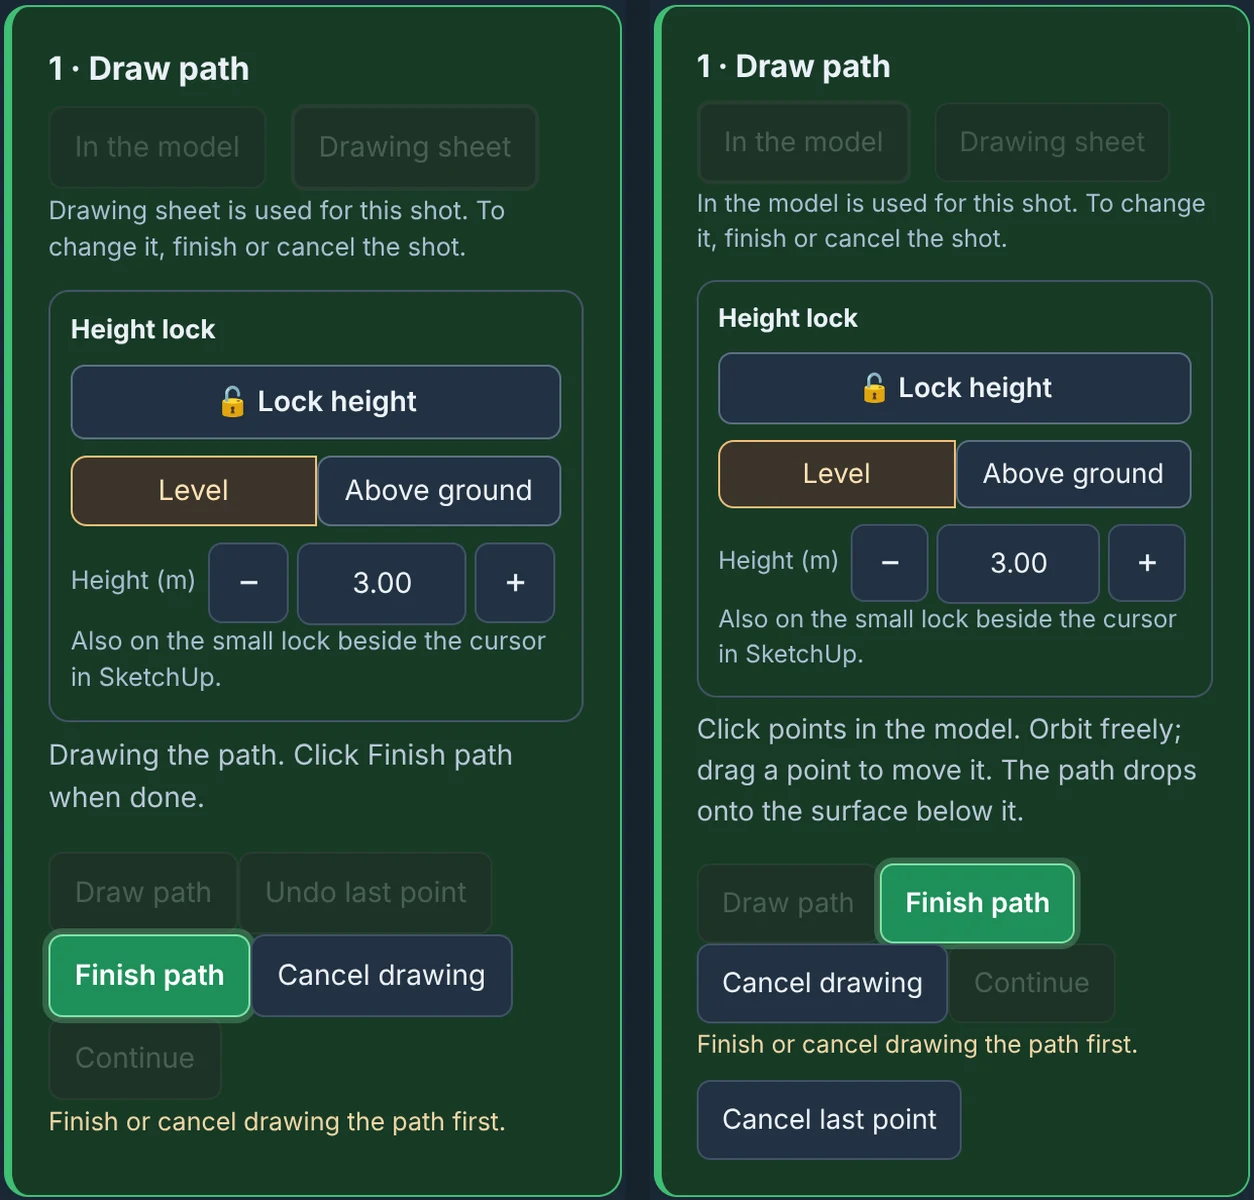
Actual interface captures from version 1.0.0. Some labels and layout may differ in version 1.0.3. Select a panel to enlarge it.
Six routes, your own framing
The written guide and panel references are ready below.
Orbit, Ellipse orbit, Spiral, Rise & reveal, Fly-over or Custom path. Start the route around a building or a point you choose.
Adjust size, height, arc and direction for the selected route. For a Custom path, edit points and their heights, and use Roundness to soften turns.
Choose Level, Above ground or Above surface where offered. Above surface lets you set a margin above a selected surface.
Keep looking along the path, aim at a point, lead the aim point, or move from Detail → whole where available. Preview the complete flight before exporting.

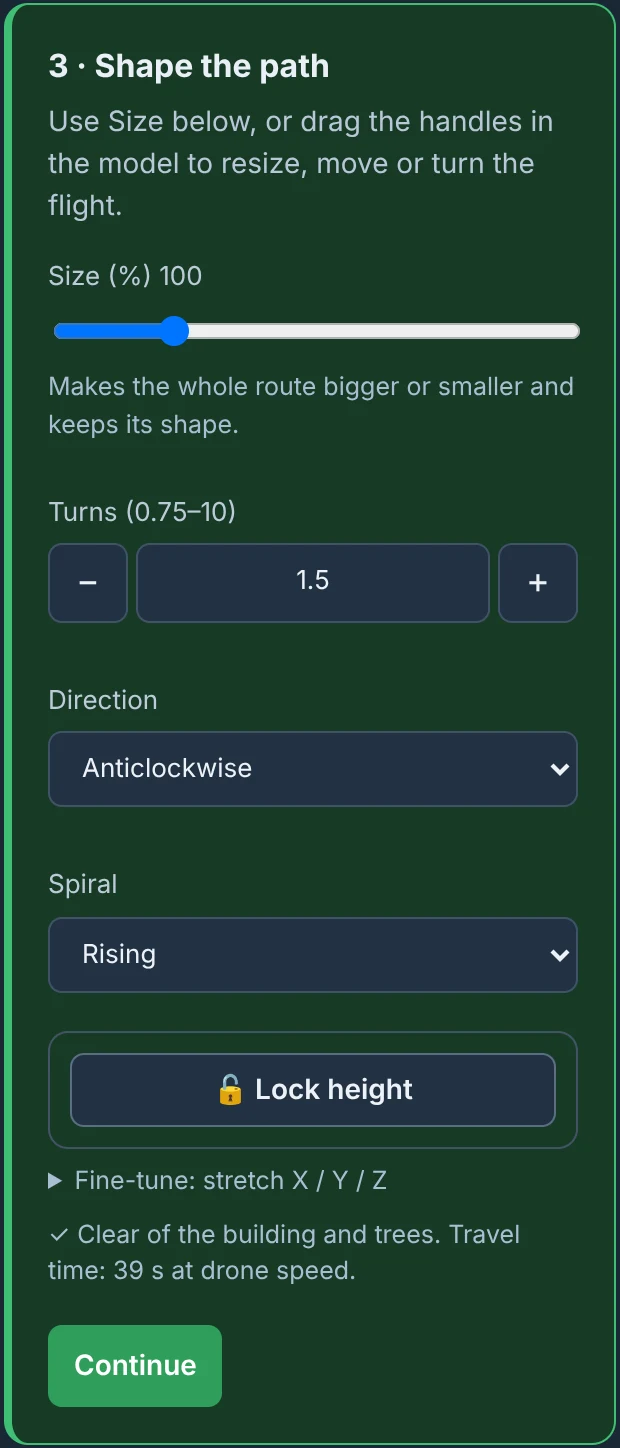
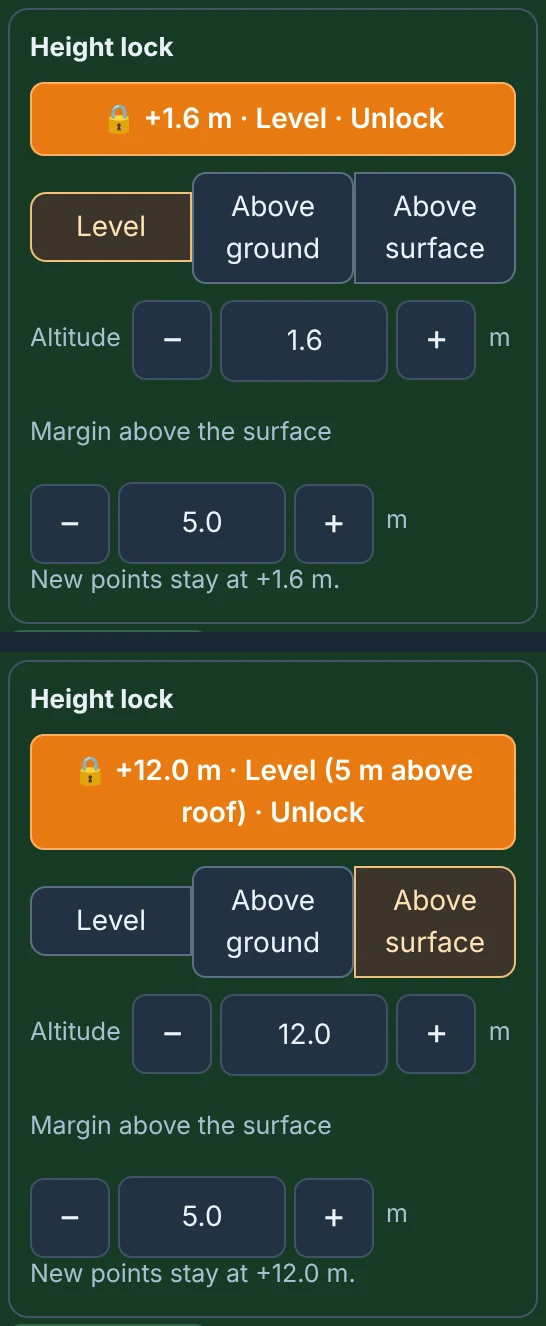
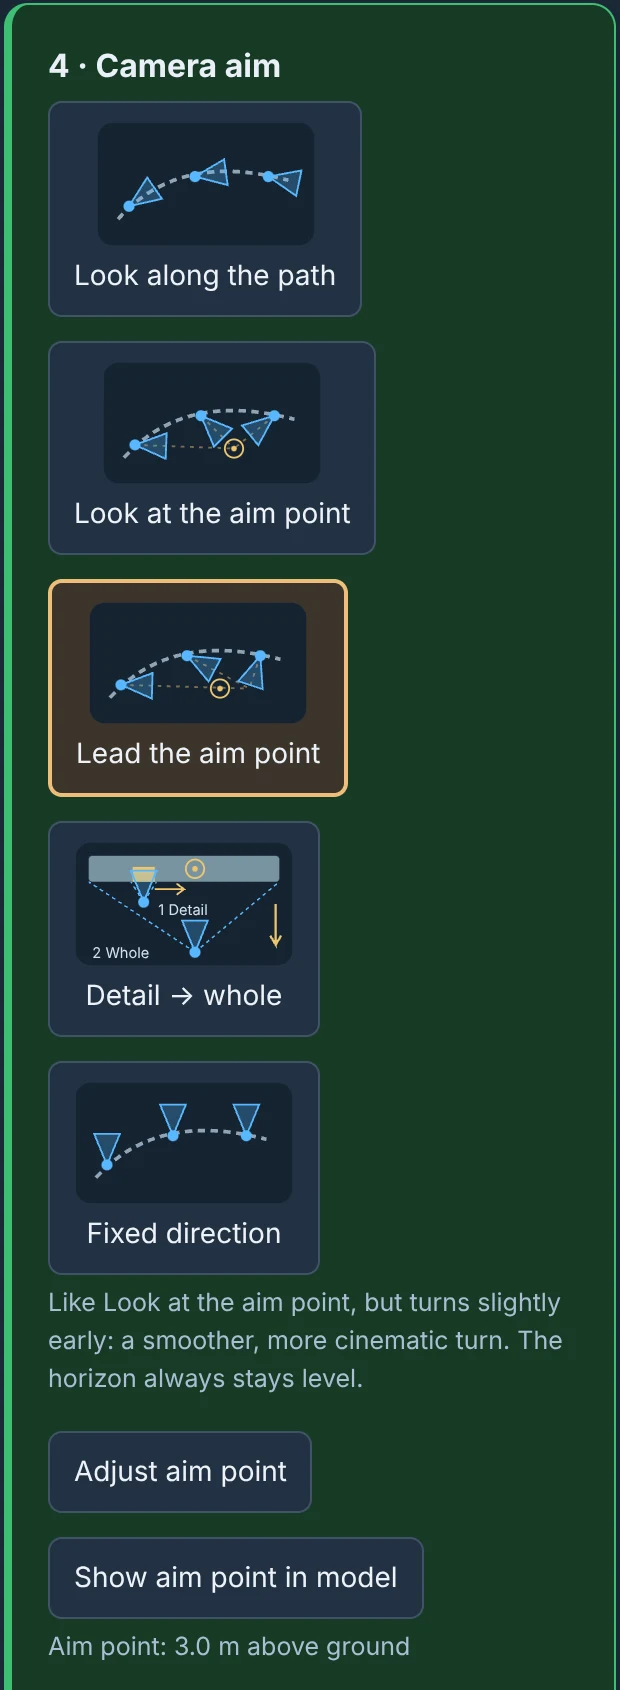
Actual interface captures from version 1.0.0. Some labels and layout may differ in version 1.0.3. Select a panel to enlarge it.
Present an elevation in motion
The written guide and panel references are ready below.
Pick the facade or use an existing painted Highlight. Confirm the viewing side.
Draw the slide path in the model or on the drawing sheet. Reverse direction or flip the viewing side when needed.
Set distance back, camera height and field of view. Use horizontal or vertical movement to suit the feature.
Use the available height controls to suit the terrain, then preview the entire path and check the framing.

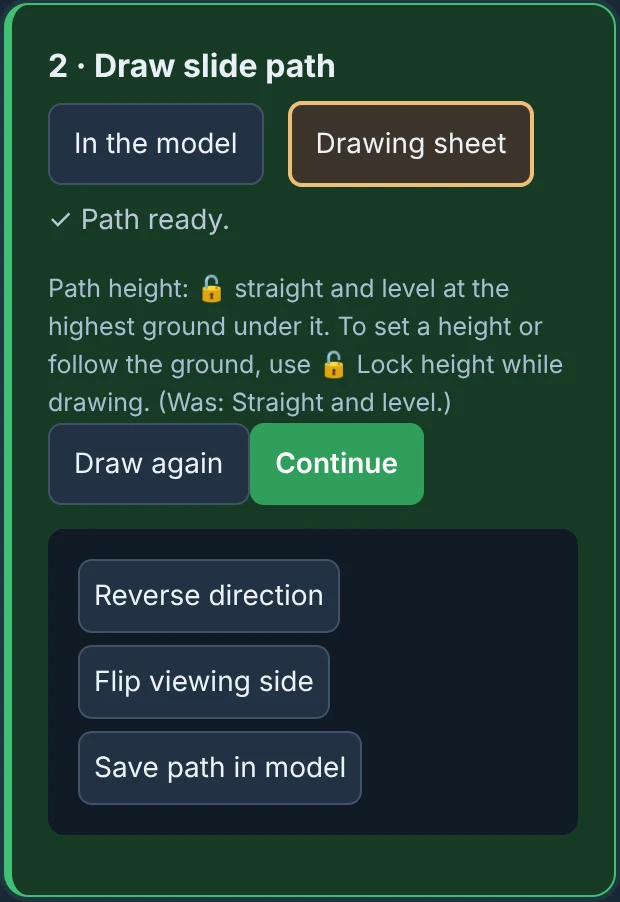
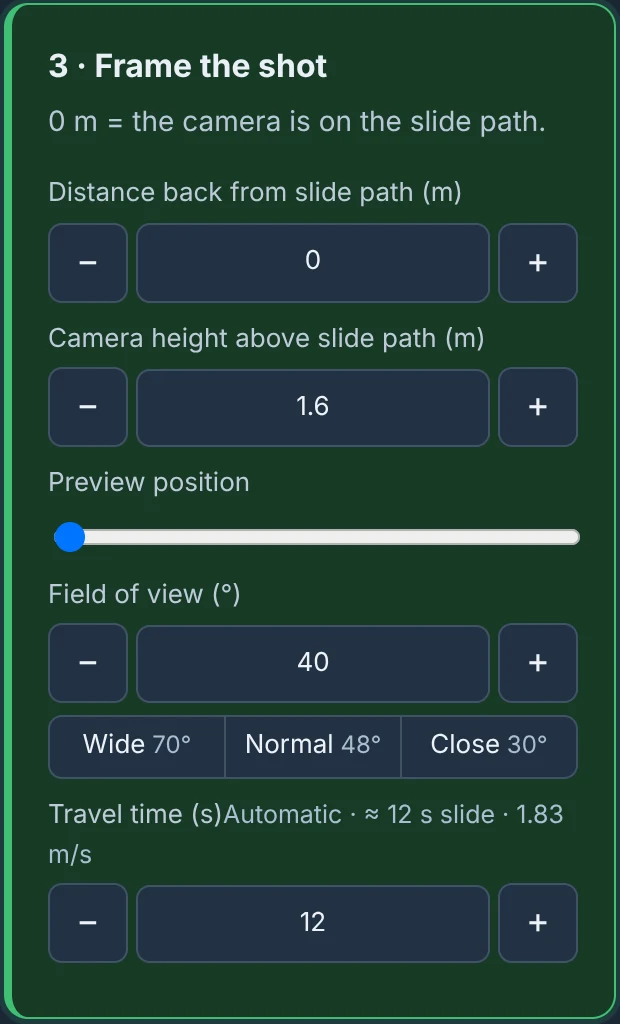
Actual interface captures from version 1.0.0. Some labels and layout may differ in version 1.0.3. Select a panel to enlarge it.
Help viewers notice what matters
The written guide and panel references are ready below.
Mark an entrance, facade, sculpture, landscape area or view. Give it a useful name. Painting a Highlight does not repaint your model geometry.
Choose Key, Normal or Glance to express its priority. Review and edit Highlights from their panel.
Use Glance, Follow, Reveal, Approach or Pass-by as appropriate to the shot.
Watch how the shot approaches the feature and adjust hold, slowdown and framing to keep the movement natural.
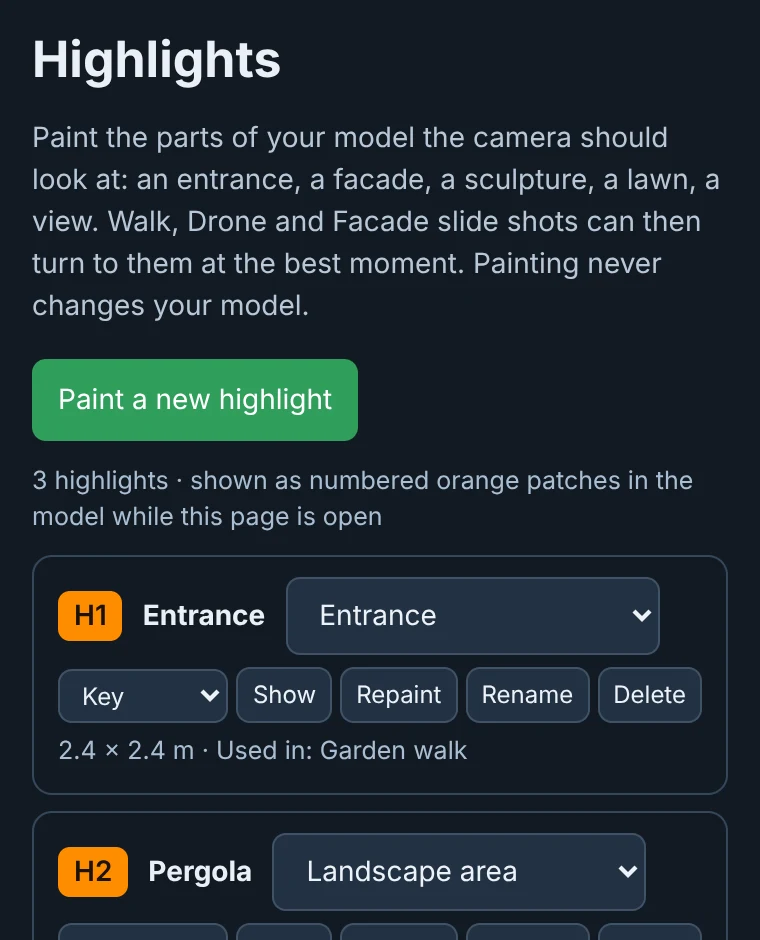
Actual interface captures from version 1.0.0. Some labels and layout may differ in version 1.0.3. Select a panel to enlarge it.
Build the sequence, slides and soundtrack
The written guide and panel references are ready below.
Move shots earlier or later and choose which items are In movie. Play the whole movie to check the order.
Introduce the project, divide the film into parts or add a closing slide. Edit title, subtitle, font and colours.
Use Cut, Fade through black or Cross dissolve. A supported Seamless flight connects one camera movement to the next.
Choose Off, Auto or Manual. Manual offers eight instruments and five moods. Use Create new for another tune, and adjust the volume.
Check the pacing, slides, transitions and soundtrack together before exporting.
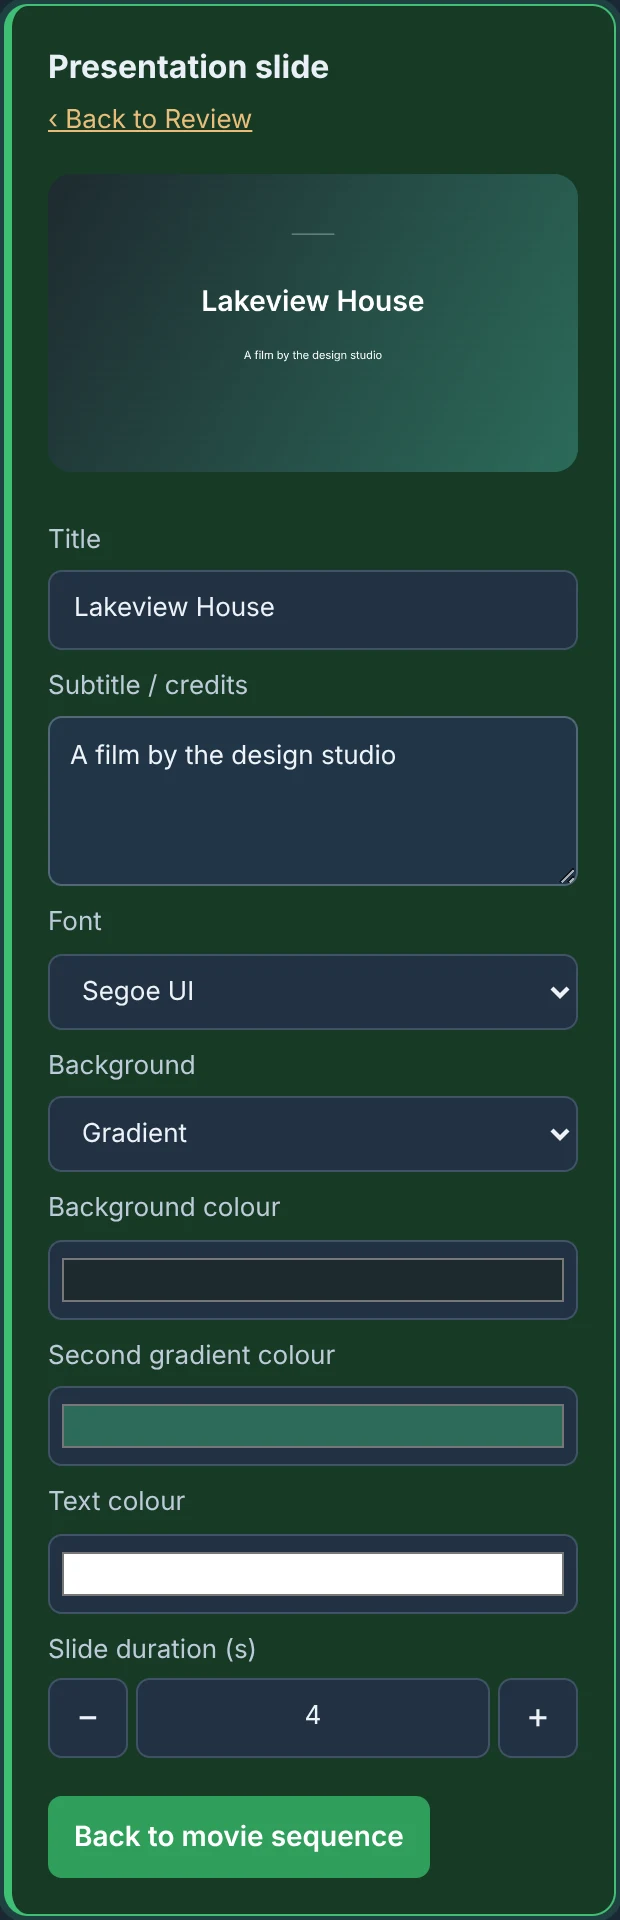
Actual interface captures from version 1.0.0. Some labels and layout may differ in version 1.0.3. Select a panel to enlarge it.
Choose a look and make it yours
The written guide and panel references are ready below.
SketchUp look retains a familiar model presentation. Enhanced look adds sky lighting and colour choices. Composite look offers twelve visual styles.
Explore Daylight, Cinematic golden, Dusk, Midnight moonlight, Cinematic moonlight, Soft pastel, Architectural model, Ink and colour, Watercolour, Toon, Miniature and Claymation.
Choose sky and edge settings, then fine-tune exposure, colour, warmth, contrast, shadows, glow, vignette, grain, texture strength, hand-painted wobble and the style effect. Reset to preset restores the starting values.
Open the Textures page to review available choices or keep a plain colour. These presentation choices do not change your original model.
Use Preview final look to check the selected shot before rendering the movie. Refresh the still after changing the model.
Actual interface captures from version 1.0.0. Some labels and layout may differ in version 1.0.3. Select a panel to enlarge it.
Export the film you have planned
The written guide and panel references are ready below.
Render the Whole movie, This shot only or Selected shots.
Start with a quick preview when checking a sequence. Final output choices include 720p, 1080p and 4K, with frame rates from 24 to 60 fps.
The render window provides a time estimate before Start. Actual time depends on your model, settings and computer.
Choose the offered output format, such as MP4 or WebM, and start the export. Do not edit the model while rendering. Review the saved movie afterward; trial exports carry a watermark.
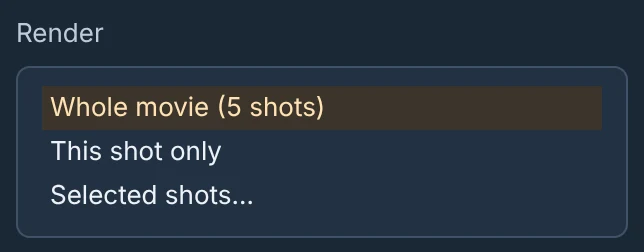
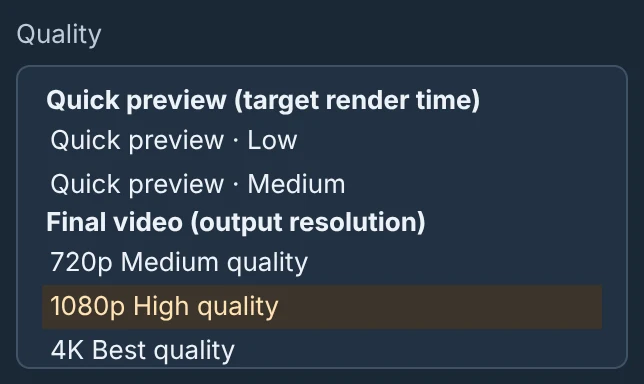
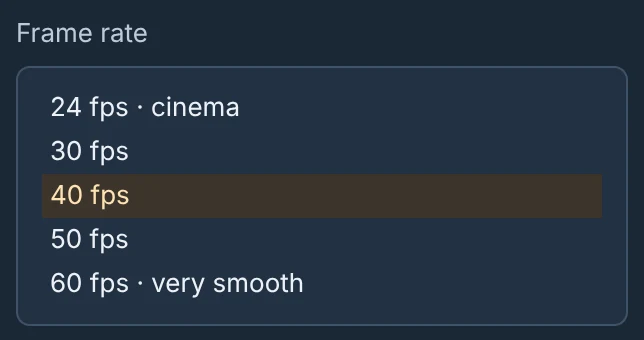
Actual interface captures from version 1.0.0. Some labels and layout may differ in version 1.0.3. Select a panel to enlarge it.
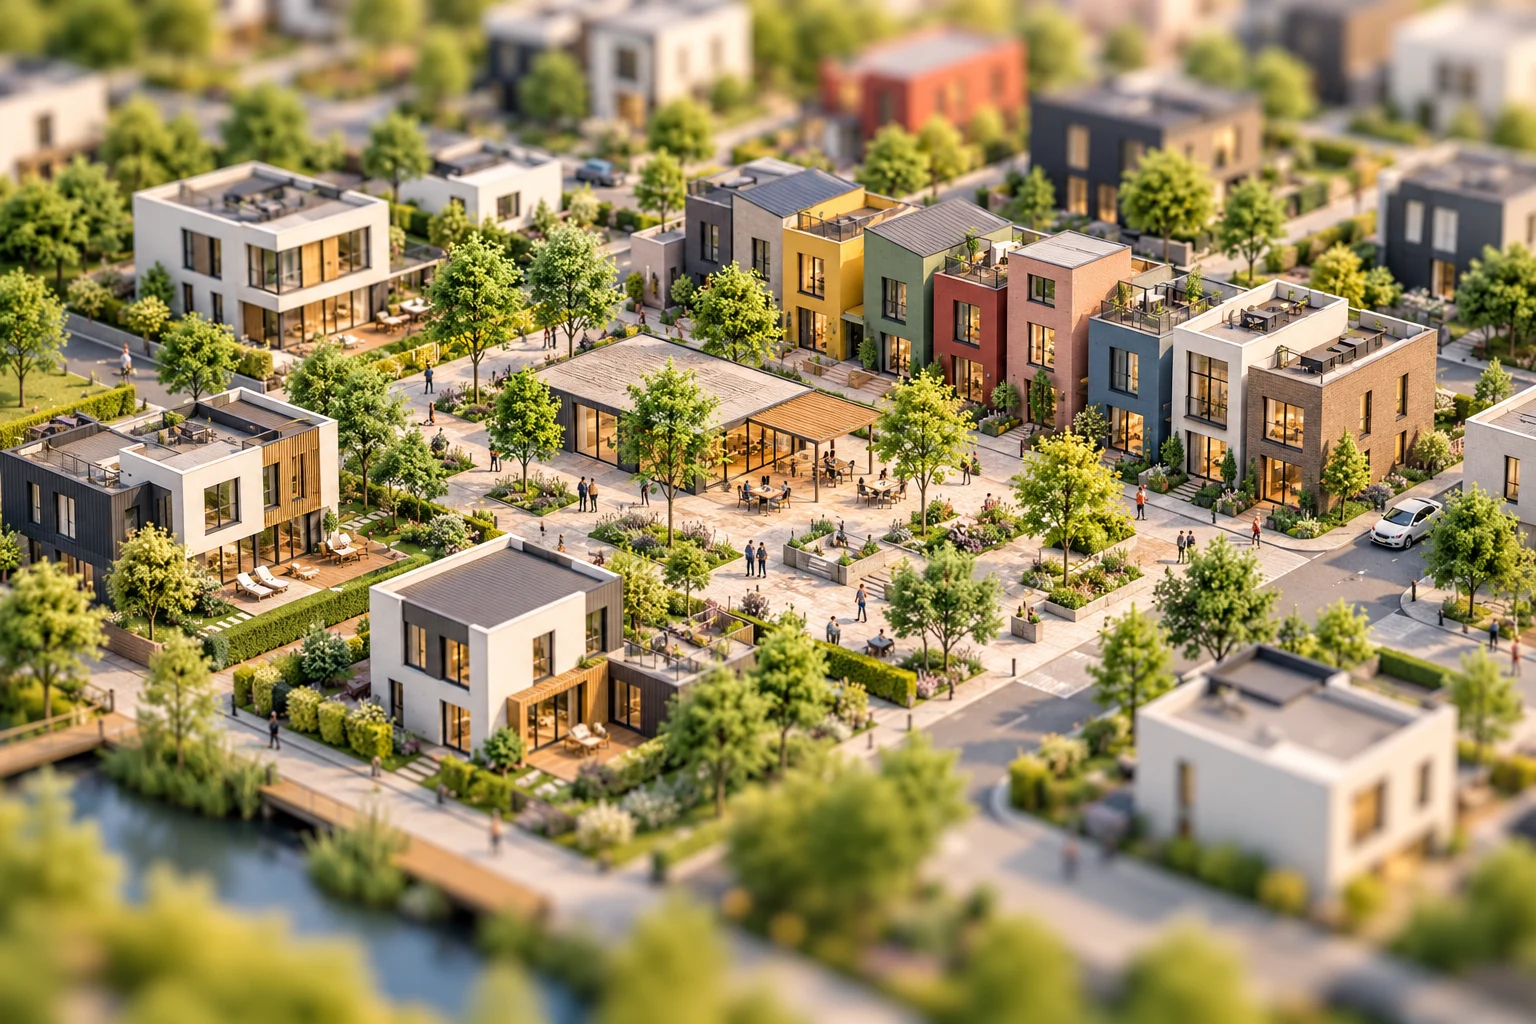
Imagine your next film
Bring a sequence of views together into one film.
Illustrative concept · not a plugin renderModel Director for SketchUp.
A plugin by Sketchingo.
6 months · 2 computers · No automatic charge
Buy Model Director — US$29 ↗Version 1.0.3 · Windows · SketchUp 2024. One paid licence covers two computers. No automatic charge.
Download the RBZ, then in SketchUp 2024 open Extensions → Extension Manager → Install Extension and select the downloaded file. Open Model Director from Extensions. Windows is the tested platform for this release.
The trial lasts 14 days and videos carry a watermark. When the trial ends, purchase and activate a licence to continue exporting.
Your MDIR licence key appears after payment and is emailed to you. Open Model Director → More → Licence (or Activate in the trial notice), and enter the key. One licence can be active on two computers.
US$29 buys six calendar months. There is no automatic charge. Renewal is available only when six months or less remain on your subscription. Renew early and the next six months start after your existing expiry; renew after expiry and they start from the renewal payment. An expired paid licence can export with a watermark until renewed.
Auto Shot is not enabled in version 1.0.3. Create and edit Walk, Facade Slide and Drone shots manually.
Use More → Feedback inside Model Director, or email support@sketchingo.com. Updates are checked periodically when you open the plugin; you can also check manually from its menu.
Need more help? Email support or use More → Feedback in the plugin. For a lost licence email, contact us from your purchase email address.
Simpler progress messages and a streamlined installer. Existing licences and saved movie setups continue to work.